DOF Reality H3!
So I finally found time to build the 3 degree of freedom simulator from dofreality.com this weekend. It took about a day to assemble mostly because I wanted to install seat sliders and also the instructions didn't exactly show how to connect the motors. Well here's the photo journal of how I assembled it and the finished product! Enjoy! I did a few laps at Mugello with Assetto Corsa in a McLaren 570s and had a blast! Gotta try the Nurburgring in a Ferrari S70H next!!


 e
e


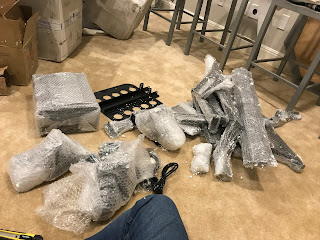
Parts is parts! OMG they used so much packing tape it was unreal! The good thing about it though is that nothing was damaged at all probably *because* they used so much packing tape and bubble wrap.

The Sparco Chrono Road looms in the distance. It's been waiting for its home for 2 weeks!

Interesting motors... tiny it seems, but the wifey doesn't want something crazy anyway probably...

About a 12"x10"x5" box for the controller. Very clean, one power input, one USB output, and 3 power/serial interfaces for the 3 motors one for each "degree of freedom" (DOF).
 e
e
The pitch and roll motors. The 'yaw' motor is connected to part of the base.

The 'yaw' motor (bottom) and parts of the base.

Screws for the base.

Connecting the base pieces with screws.

The completed base.

Top side of the base. The orange hole on the right will be where the top of the rig pivots to simulate the loss of rear tire traction.

The base of the rig with the 'yaw' motor attached.

Incorrect installation of the pitch and roll motors. They never put pictures of how the motors attach to the frame so I used the wheel mounting screws here by mistake.

I looked on their website to see how the motors attach to the frame and now they are going in correctly.

Motors all attached! (it turns out that the screws for the sensors on these motors are bent in this picture and they aren't supposed to be. So I had to unbend them later. I suppose they got bent in shipping but it isn't too difficult to unbend them)

Putting the main beam on top and attaching to the motors.

Pedal holder attached. Adding pieces for the seat and wheel.

Oops, the Sparco sliding brackets don't fit the holes! It wasn't intended to have sliding brackets attached to it, but I want to be able to adjust the chair so I just used 3 holes to connect the brackets.

Chair attached!

Wheel tray attached.

Control box connected to motor cables.

USB port and power connected to control box.

Powering on the control box.

Ok it's a mess in here, need to move things around and get rid of the old crickety snack table currently hold the steering wheel and shifter.

The DOFReality H3 has moved in!

Top view of the Chrono Road.

Side view with shifter and wheel.

Another top view.

More views, table with 4k Dell monitor, Pimax 4K goggles, wireless keyboard and mouse.


Thank you Igor and DOFReality for making an amazing simulator!
ReplyDeleteFrom your URL, may I conclude that you are a fellow Kenyan?
ReplyDeleteI'm not actually a Kenyan ;)
DeleteHi, I'm interested in the H3 as well. How do you like it so far? Has your driving improved?
ReplyDeleteIt has been over 6 months and it is still quite fun to use! I don't get to drive everyday, but it has been pretty reliable and still a joy to drive. I think it probably makes it more challenging to drive because you get physically shifted if you turn too quickly or make a mistake!
DeleteHi there. I'm interested in ordering the H3 and have communicated with Igor from DOF Reality. This unit seems like the cheapest and most compact 3dof available. Can you comment further on the noise level, performance, and other issues to consider? Thanks so much. Your pics brought alot of clarity to the entire rig.
ReplyDeleteIt is pretty quiet actually, the only noise it makes sometimes is a high pitched sound from the "drift" motor but if you are wearing headphones or a VR headset then you can't hear it at all. The rig is very compact, and I like that about it. Miraculously my seat still has not fallen off the rig even though the brackets don't quite fit the rig perfectly. I'd ask Igor for a seat recommendation so that the brackets fit perfectly if I had to do it again, though so far it still seems to be working out just fine. I don't weigh that much either (175lbs) so I'm not really that worried about the seat falling off. If I weighed closer to 250lbs then I might be a little concerned about always balancing myself on the seat as it does throw you left and right quite a bit.
DeleteI have the P6 and that high pitched whirring is DEFINITELY annoying. Glad it isn't just mine.
DeleteHello there,
ReplyDeleteThank you for sharing. Your setup looks amazing.
Question about the Sparco Sliding Brackets. Can you please explain again in detail that how your resolve the fitting issue? Do you need to drill holes on the Sparco brackets?
Thank you in advance, Steve
whot On-Ear Headphones for Oculus Rift du you have?
ReplyDeleteThank you for your pictures. I just ordered my H3 and I'm so anxious for the build
ReplyDeleteTo get the most out of your Elden Ring experience, acquiring powerful Elden Ring items can make a significant difference in your gameplay. MMOexp is an excellent resource for players looking to enhance their adventure with high-quality items. They offer a variety of Elden Ring items that can boost your character's abilities and help you tackle the game's toughest challenges. By using MMOexp, you ensure that you're investing in reliable and effective gear, allowing you to focus on exploring and conquering the world of Elden Ring with confidence.
ReplyDelete